

Sometimes I want to make something....anything.....just because I am in love with a certain line of fabric and want an excuse to buy some. In this case, it was Early Bird by Cosmo Cricket. I love the colors and the cute retro feel of it. I decided to try a pillow case. It seemed fitting, because one of the lines of text on this fabric reads "if we were meant to pop out of bed, we would all sleep in toasters". That is SO me. I am not one to pop right out of bed. I have to hit the snooze at least three times before I'm up.
This is the first time I've made a pillowcase like this and it turned out just like I imagined it, with the exception of the side trim. I made mine wider than I will suggest to you, because I would definitely trim it down when I make another. In the photo above, I folded it in a bit so it will look the way yours will if you follow the measurements in this tutorial.
You will need 2/3 yard of your main fabric, 1/4 yard for your side trim, and two fat quarters for your prairie points.
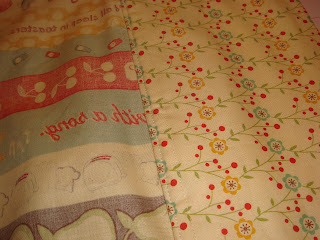
Trim your main fabric to 20"x24", your side trim fabric to 20"x9", and cut your fat quarters into 5" squares. (The fabric in the photo is folded in half lengthwise).


Lay your side trim fabric out on a table and arrange your prairie point on it the way you would like them to look. If you are using two different prints, the way I did, start and end with the same print. We will add in the missing piece later on. Pin them in place.

Stitch the prairie points on using a 1/8" seam (we are just tacking them on, we don't want to see this seam later. That's why it is so small)

Now sew your side trim together along the side, forming a loop (keep in mind that the one in this photo is wider than yours will be).

Press the seam open, then with wrong sides together, fold the loop nearly in half. We want an extra 1/4" or so on the side without the prairie points sewn to it. (Sorry, this is the most complicated part!) This step will allow us to hide some of our raw edges later so that you don't get all kinds of strings coming off of your pillow case whenever you wash it.

This part is a bit hard to explain as well, I hope it comes through ok. Now pin the side trim to the pillowcase body, as shown in the picture. Slip in the missing prairie point at this time and pin it in place (it will go right at the seam between the first and last prairie point). When you have it ready to sew, the prairie points should be sandwiched in between the main pillow body and the side trim material.

Sew the pieces together using a 1/4" seam.
Turn inside out and press the seam away from the opening of the pillowcase.
Keeping the pillowcase inside out, turn the raw edge under to cover all the other raw edges (shown in picture). Sew right along the edge to hold in place. You might want to pin your prairie points out of the way so that they don't get caught in your stitching (mind did!)


Here it is with the raw edge sewn under.
And that's it! I think these would make darling wedding or bridal shower gifts along with a set of sheets. Enjoy, and please leave a comment if you have any questions.

Okay, so Tamara showed me this pillow case today, and it is so adorable; even cuter in person--if you can believe! I love the fabric! Very very cute!!! Stacey :)
ReplyDeleteI love this fabric....just included it in one of my art quilts. Love the idea of a pillow case. Thanks!
ReplyDelete